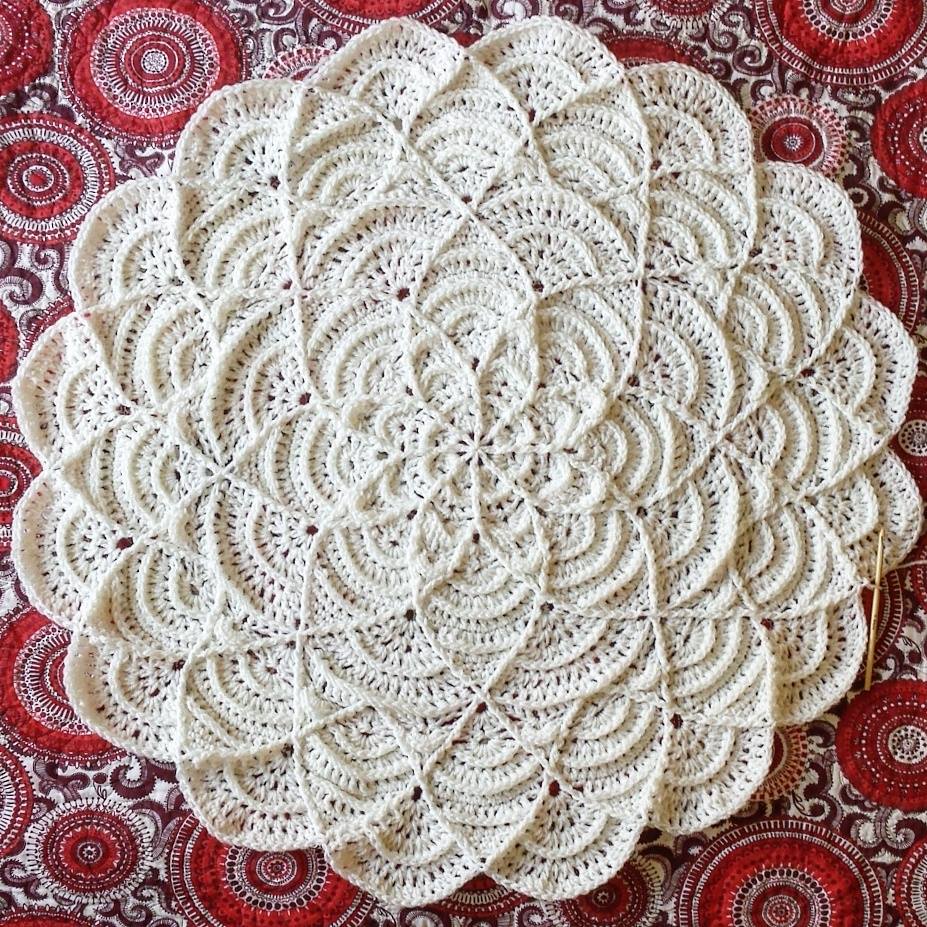
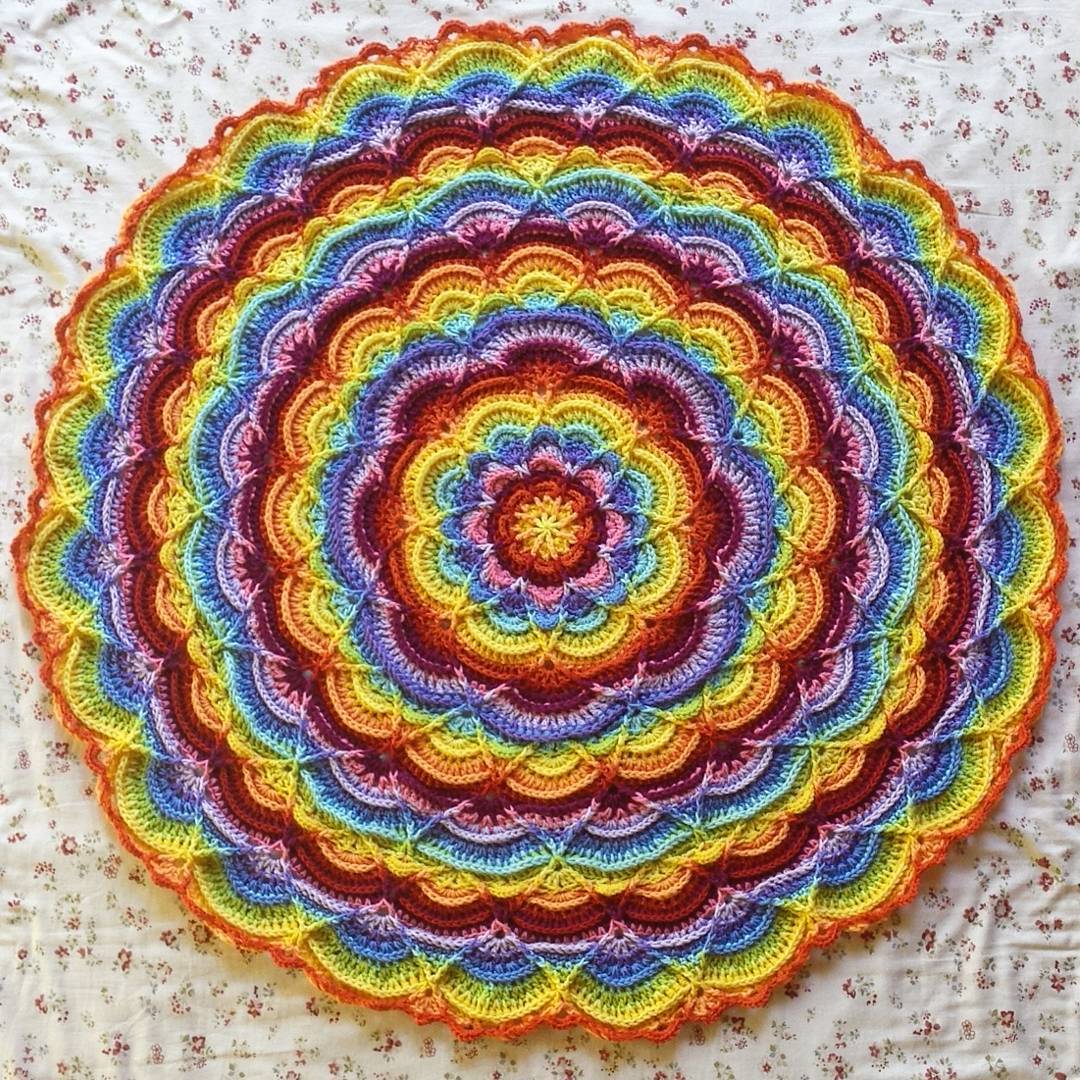
The Flower Puddles patterns is growing by rounds and rounds! In addition to the Flower Puddles Motif and Granny, I’ve added a Flower Puddles Ripples blanket to the growing collection.
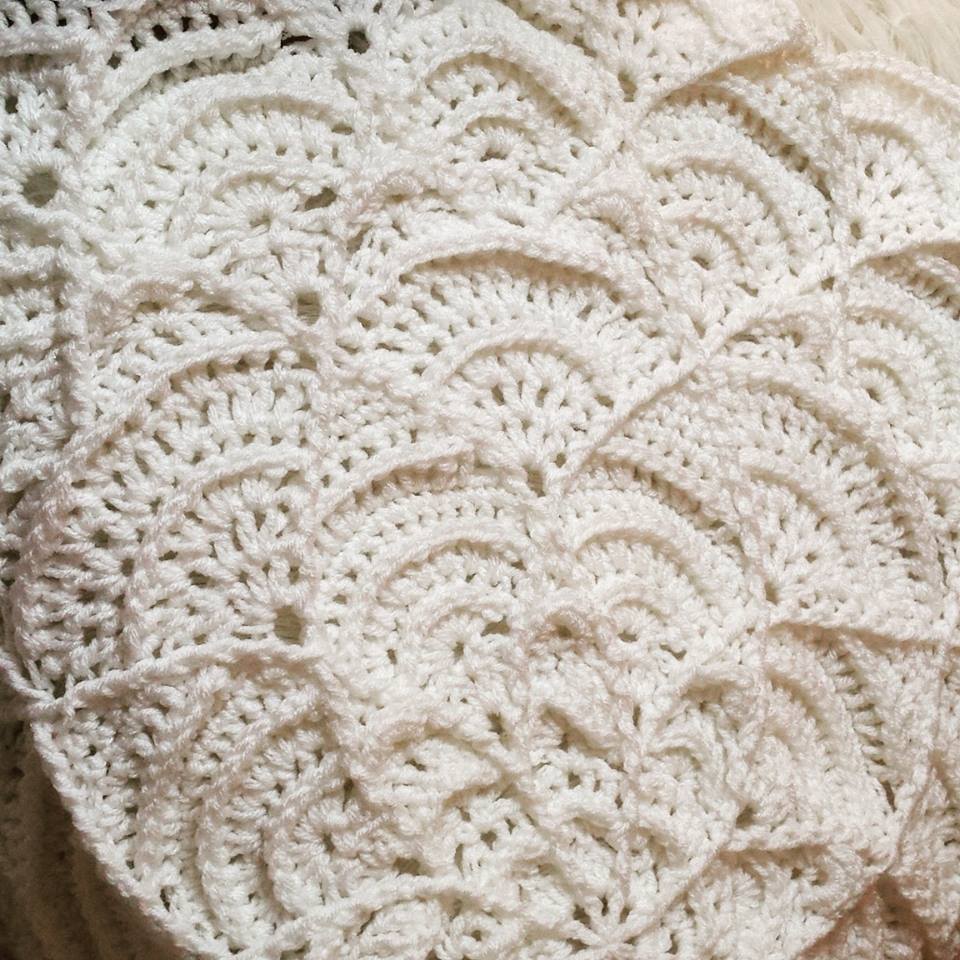
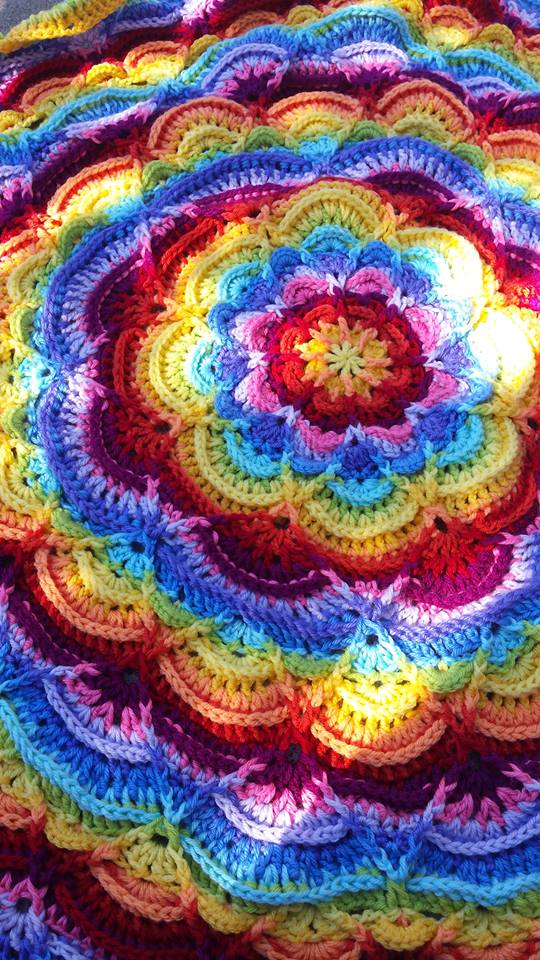
My favorite thing about this design is how different it looks it looks in a solid color versus the rainbow version. The colorful version looks nice and textured but really in accentuates the fan stitching in the rounds, while the solid white version accentuates the long bands of cabling that form the lotus shape.
In making the prototypes, I ended up with two completely different looking blankets from this one pattern! That’s a win for me, and hopefully something you can appreciate as well.
An exciting feature about the pattern is that it can be made as large as you’d like. You can make anything from a baby blanket to a bead spread, the pattern repeats with increases so you can stop wherever you want to. The pattern itself also contains both US and UK terminology.
This Flower Puddles & Ripples is now up in my Ravelry shop and can be purchase independently or as part of the Flower Puddles Collection. Enjoy!
I love this pattern. It is so easy to follow and it is so fun to see the design grow as if a flower is blooming from a bud. But, having said that, I am having a problem with row 36. After the section “bpdc around next six stitches” it says to “(fpdc around both fpdc from previous round) 2 times”. The previous round is 35 (which is row 21 of repeat). There are no fpdc’s in row 21 only fpdc2tog’s. Am I reading this incorrectly? Any help would be most appreciated. Again, I love how easy and fun this pattern is.
You found a typo in the pattern! R36 should say to “Fpdc + ch2 + Fpdc around Fpdc2tog from previous…” I will change that right now and send the update.
At round 19 it says bptr into each of the next twelve stitches but I only have 10 between the fptr from round 18? Am I doing something wrong? Hopefully you can help! Enjoying pattern so far!
Hi Karen, I think you missed the additional 2 Dc after the parenthesis in R18. Please take a look at the pattern again and you’ll see them. Also, there is a note just at the beginning of the pattern about overlooking these, it seems to happen a lot.
I am in the middle of making this pattern and I am kind of stumped and looking for help. I have finished row 37 and gone back to continue at row 10 and I am just not getting how this is supposed to come out can you please please clarify this for me? My email address is janeyloukelly@hotmail.com. Thank you so much
Hello Jane, this is probably the most odd part of the pattern since it will not follow the previous pattern of using the existing cables that you’ve already created. Rather, you will be creating new cable paths in the middle of the arches, as well as using the existing cable paths as you continue. This is the only way to add arches into the pattern so it can grow wider. R36 sets you up with the correct amount of stitches to become the foundation for building those new cable paths.